Formation of a Copper Lotus Finial Part 5
After the third petal, the process naturally smoothed out, and the work went quickly. However, I found
that two items needed periodic attention: first, the centerline crease would fade, and then the
petals would lose their symmetry by immediately attempting to ``propeller." Ah, the corners we create
for ourselves!..
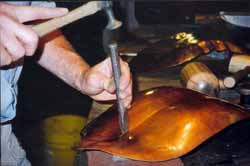
Reworking the centerline crease
The tips were clamped to little angled tabs, which were screwed onto the top level of the buck. Since the
bottom flanges were turned up only after most of the shape was in the panel, they were first
struck over a stake to establish the curved edge, and the flange was then stretched. To
contour the petal bottom, again, to the buck...
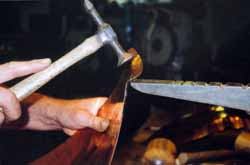
Striking the flange over the stake
Part 1 | Part 2 | Part 3 | Part 4 | Part 5 | Part 6


