Replacing Old Door Skins
Replacing Old Door Skins
from Custom Planes, September 1999
Once upon a time there was an old Stinson Voyager undergoing a very nice restoration, and so its decrepit old cockpit doors needed an overhaul. This is the story of one way to do it.
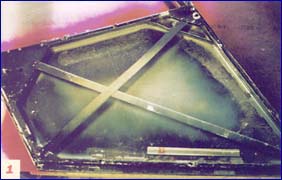
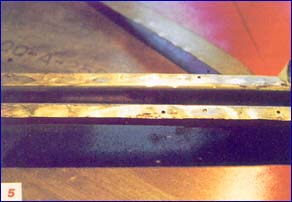
Because the door frames (6061) showed signs of old repairs, and because the skins needed replacement, the simplest approach was to separate the skins from the frames. First, I needed to find all the spot welds, (highlighting them by sanding helped), and then, I needed to break the welds carefully. Because the frames were a thicker section (.032 inch) than the skins (.025 inch), they came apart quickly, leaving most of the weld nuggets standing proud on the frames.
I then removed the old patches from the frames and cleaned and tack-welded the numerous cracks.
Next, I jigged up the now-flabby frames to match the fuselage with a simple set of wood blocks, finished the welding and dressed off the welds. The cleaned-up frames then fit into the opening and also matched the outer fuselage contour.
Realigning the old skins to the jigged frames and then checking the surface with a straightedge confirmed the compound nature of the skin surfaces. Closer analysis revealed exactly where the crown centered, the height of it and the rate of rise. Thinking over the choices of handwork, air hammer or wheel, I decided on the wheel because of the skin thickness. A few passes with light pressure had it close, and another few centered up the crown quite nicely.
Fastening them back together had already been thought through while doing the prior drudge work: Because there is thick foam weather strip all around the inside door edge, I would double-dimple and flush-set the AN426 A3-4 AD rivets on a 1:1 replacement for the spot-welds. Using the lattice-spacer and the handy homemade universal dimpler made short work of the riveting task. I used a 4AX gun (very light) to dimple, using a rivet for the male die, and to set the rivets, as well. (I advise practicing for a while on scrap for this trick, because tool line-up is really important.)
When everything was completely fastened, I went over the completed doors with the finishing spoon and small shot bag to tune up the contours for paint. A touch with the sander helped with a few burrs, and according to the owner, they now fit better than new.
A thorough inspection of both doors revealed damage to both the skins and the frames, with patches and doublers hiding cracks and broken welds. However, the door shapes seemed sort of consistent with both the door openings and the contour of the fuselage. The doublers were removed first, as they were preventing the frames from curving properly.
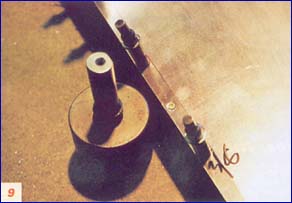
Measurement of the metal thickness revealed .025" skins and .032" frames spot-welded together. The alloy is 6061 and the temper is T3, as seen from the markings still left. Sanding the skin lightly reveals location, number, and diameter of spot welds. A nick with the rotary file (burr) insures that the chisel will break the weld cleanly, leaving the nugget on the frame.
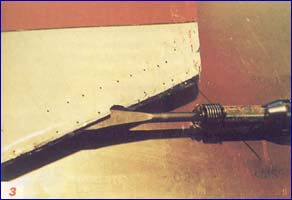
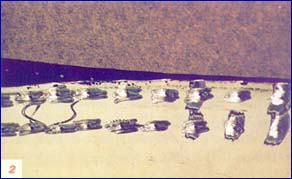
A small 3AAAX gun set to low pressure will break the welds cleanly, if the chisel is sharp. (In some cases, as when the frame is much thicker than the skin, it's unnecessary to burr the welds first since careful lift-and-chiseling will break the weld and leave the nugget on the frame, well -98% of the time.)
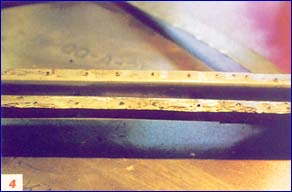
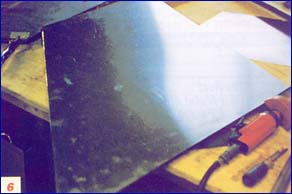
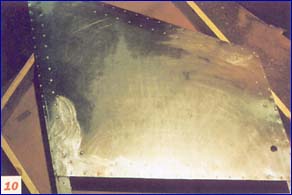
These bumps are to be carefully sanded down, so the skin will again lay flat. (Because of the lifting action of the chisel, minor high spots come up which are tapped down with a plastic hammer over a block of wood.)
The finished surface is flat and smooth.
The frames are welded up and re-contoured to match the opening, with the old skins serving to guide the process. Then new skins are cut to match and now we get ready to contour or crown them up, because they are slightly compound shaped, as indicated by a straight edge.
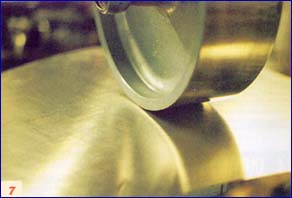
A small wheeling machine crowns them up in 20 minutes, if I make sure to mark the topography, and follow it. Pressures and tracking patterns vary with each job, so I won't go into this detail here.
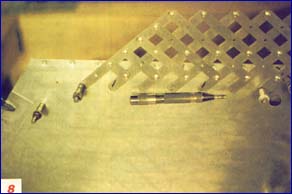
The leading edge of the panel is then cocked over 10 degrees using the brake, matching the original. Once the rivet distance and layout is figured, (no spot-welding here) it is easy to set up for double dimpling. This job is perfect because the weather-strip will hide all the shop heads and dimples.
For double-dimpling I use a sawed-off rivet set (annealed) drilled and countersunk for the proper clearance, and then mount it in a convenient heavy ``handle." The rivet is placed in the hole, backed with the dimpler, and shot gently with a flush set. Too frisky with the gun and you have a proud, not-so-flush rivet with a smiley at the edge.
All done! (I did need to do a little bumping from the back to get some lows up, and then thump the face with the spoon to lessen those proud spots.)
Back to Articles by the Tinman


