Repairing Aluminum Part 3
Repairing Aluminum Part 3
When the dolly is used to back up the work while hammering, it will help planish or smooth the work-if the tool contours are right and if the hammer and dolly do not contact directly too often. For each time the hammer strikes the dolly directly, the metal will stretch or, if the contours are ill-matched, stretching and marring will occur.
Planished metal can be taken to a high degree of finish, even to a polish-if enough patience is applied. Simply go over the panel, working out the worst high and low spots with each pass, until the desired smoothness is achieved. Sometimes three passes will do; sometimes it may take six or seven.
General Guidelines for Straightening a Ripped Panel
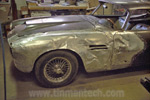
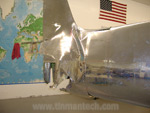
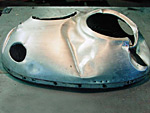
Let's say an aluminum fender, lid or hood has a nicely dented and ripped area that, if it were repaired well, would save $500 over replacement of the part. Let's say a comparable steel job would take 6-8 hours to repair. To accomplish a good-quality aluminum repair should require only a bit more time, unless there is need for weird pry bars because of an access problem. (Over the years my, spoon and pry bar collection has grown considerably because of the profit motive behind quality repairs on the right part.)
Begin the attack as described previously by bumping and pushing, but keep a close eye on the rip, for if it widens or behaves uncooperatively, it will need to be tied together with a few tacks or a couple of skips (welding specifics later). Use the residual heat of the welds to your advantage and work hot. Knock down the hot high spots and bump up the lows quickly. Working in this fashion cools the panel fairly quickly (and heats up the tools).
When the straightening process has been carried out to a 60 percent level, finish up the welding.
Planish around the weld as best you can, using heat and mechanical advantage. At some point, the weld may have to be dressed down (filed or ground) in order to proceed further.
Grinding & Cutting
When the weld is too high for hammering, or if there is too much penetration with gobs on the backside, a good dressing will thin just the weld down without sacrificing the thickness of neighboring areas.
Note: Ear, eye and air protection are needed when grinding and cutting, and it is essential that you watch out for your neighbors.
Rotary Files:
- 15,000 rpm or better.
- Carbide or the "aluminum cut" type burr cut very fast in specific areas.
- Use beeswax regularly on the cutter burr to free chips and prevent loading.
- Medium-fast teardown.
Air Grinder:
- Pistol grip 20,000 rpm mg wheel.
- Grinds specific areas taste of beeswax now vent stone loading.)
- Fast teardown.
"7" Pistol Air Grinder:
- 20,000 rpm with 36-grit or 50-grit disc.
- Watch the neighboring areas with this one! Hit with beeswax for free cut.
- Medium teardown.
Vixen File:
- Curved tooth, 8-10 teeth per inch.
- Good to check level or crowned contours with a stroke or two. Spray-oil frees teeth of chips.
Special "Aluminum Cut" Files:
- 8-10 in. half round or flat.
- Really zip the aluminum down nicely. Good for edges and "artwork" where a good dressing really counts.
Since we're on the subject of metal removal, let's also consider cutting.
Carbide Mini-Saw (muffler saw):
- 20,000 rpm
- 3-in. discs with kerfs at 0.035, 0.063, and 0.120 in.
- The 0.035 in. disc is fast on body sheet metal.
Plasma Cutter:
- Smooth and fast on thick sheet (118 in. and over).
- The edge cracks don't matter if the edge is to be welded or the edge can be trimmed edge back one thickness.
Sabre Saw/Jig Saw:
- Fast, efficient cuts on aluminum with many blade tooth designs. Choose 14-18-tooth/in. patterns (wood cutting blades are OK on aluminum).
- Beeswax will free the chips.
- It's common in fabrication shops to use a wood cutting band saw to cut thick and thin aluminum bar and sheet. Same blade, same blade speed, slower feed, beeswax on the blade.
Circular Saw:
- It's possible to use worm-drive or direct drive circular saws on aluminum parts.
- Use carbide-tipped blades.
- 3/16 in. and thicker- use a combination blade.
- 0.032- 3/16 in.- use a 5O-60 tooth panel blade.
- Less than 0.032 in.- reverse the panel blade and use it to "wipe" the cut.
Back to Articles by the Tinman


