Metalworking can be divided into three simple categories
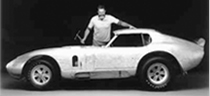
One: Fabrication - making new
Two: Alterations & customizing - making alterations to existing items
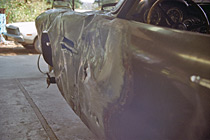
Three: Repairs, crash damage
Restoration work usually combines all three areas mentioned above, plus requires several additional processes: metal finishing (sanding, filing, and polishing); metallurgy (annealing, tempering, hardening); and knowledge of various coatings necessary to produce authentic results.
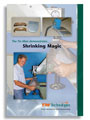
To get started in metalworking you will want to check out work being done in your specific area of interest. There are many DVDs on the market that cover all types of fabrication, customizing, and repairs. We offer several good DVDs on damage repair and shaping aluminum and steel, that I have included in the lists below. There are also many books on the market that show airplane construction, car building, and customizing, metal fabrication, and welding.
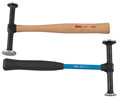
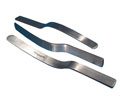
Basic tools for all three areas mentioned above are similar, to a point. Hammers, dollies (small shaped anvils that are held in the hand), snips, files, and welding gear are the basic useful items. I have chosen the items below based on years of doing and teaching metalwork. I've found these specific tools to give you the most bang for your buck.
(Get ready to do some serious navigating, as you will be clicking on the hot links below to go to product pages that will give you descriptions and photos of each item, and then using the back button at the top so you can return to this list.)
|

When you find you like metalwork, and have a little more money, ambition and/or space:
|

Welding Gear
Bigger purchase: Complete Oxy-acetylene torch setup. (Prepare to spend $500 - $1,000. to get everything you need, including a Torch & Tips, Hose, Regulators, Eye Protection ie. Welding Lenses, Flux, Filler Wire and/or Rod, tank rental, and instructional information. Please consider safety, and get yourself some flashback arrestors. If you can afford it, look into an economizer, as it will save you $$$ in the long haul).
25) Gas Torch: Once you have a torch you can heat, anneal, bend, hot shrink, solder, braze, and weld. Torches are available at hardware, welding, or farm supply stores. We sell the Meco Torch because we love the size, weight, versatility, and price. We also manufacture our own tips, hoses, and accessories for this torch (so you won't get stuck spitting flames from bad tips and that were made off-shore. This happened to us, which is why we now manufacture our own tips). We also sell regulators and hoses at very fair prices.You will need to rent various-sized propane or oxy-acetylene bottles at your local welding store. (Be forewarned: many welding and most hardware stores know little to nothing about oxy-acetylene welding. Don't be deterred by this! There are lots of great reasons to start with gas welding (acetylene or propane), but the three biggest reasons are cost (it's a lot cheaper), versatility (you can do a lot more than just weld with a torch), and portability (you can toss it in your truck and go fix stuff anywhere, no electric outlet needed).
25a) Welding Lenses: You MUST have GOOD eye protection if you're welding.
Avoid bottom-end stuff as there's a lot of marginal eye "protection" out there, so be careful. You might think I'm telling you to buy the TM2000 lenses because we make them. But the truth is, they are the best lenses you can get for gas welding because they clearly and completely eliminate the sodium-orange flare. They are more expensive, and for many people they are worth it, but get what you can afford. If you want to see a video clip that shows what it looks like to gas weld looking through these lenses go to: https://www.youtube.com/watch?v=qlgcg8xz0zI
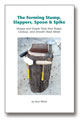
26) Instructional Booklet: Gas-Welding Aluminum, The Method Revived.
27) Instructional DVD: Gas Welding Aluminum.
28) At some point you'll need flux, wire, rod, braze, and/or solder.
28) Practice. Practice. Practice.
Large expensive equipment.
Okay, it's official â you're hooked and you're eyeballing the big buck stuff. The following items are not ranked in a particular order, because what you decide to buy first really depends on what you need to do. Some people will want the Air Power Hammer first, while others will need a bending brake. At some point you'll probably want all these machines (and maybe more I haven't mentioned).
» Bending Brake. You can start with a 4 ft, either a leaf-type or a box and pan.
» Good electric shears or a Beverly Shear, for making faster cuts on thicker metals.
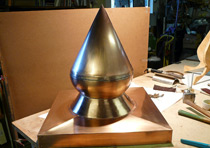
» Bead roller, for making artwork in your panels.
» Large pedal/foot/stomp shear (30", 36", or 52")
» Air Power Hammer. Don't confuse the Air Power Hammer with the common pneumatic "planishing" hammer. I'm talking about a hammer that can make detailed shapes fast, plus shrink, stretch, turn edges up or down, straighten damage, as well as planish. You will find that a good power hammer will save you more time and make you more money than just about any other tool in your shop! (It will also keep your arm from feeling like it's going to fall off and your shoulder socket from wearing out â and that's no joke!)
If you're really serious.
Whether you're just starting out or you've been doing metalwork for years, if you're really serious about improving your skills, and learning as much as possible in a short amount of time, I highly recommend our 4-Day Metalworking Intensive. (The most frequent comment we hear is "Gee I wish I'd taken this sooner, it would have saved me years of struggling and a ton of time.") You'll learn more in four days than you will in four months of watching DVDs. There's nothing like hands-on instruction if you really want to learn. Plus you can try out almost all of the tools and forming machines mentioned above, and have your questions about them answered as they come up.
Questions?
If you have any questions about anything on this list, don't hesitate to give us a call 530-292-3506, or Contact Us about technical questions