Making A Copper Finial
By Kent White
A local architect came by my shop with some drawings for a copper finial, recently. It was to be made of three different elements joined together and then it was to be placed on the roof peak of a fine new home.
Click on each image for a larger view. See our TM Technologies Air Power Hammers.
|
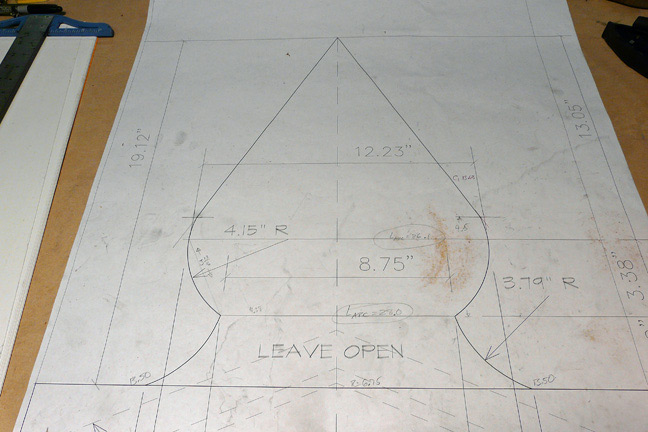
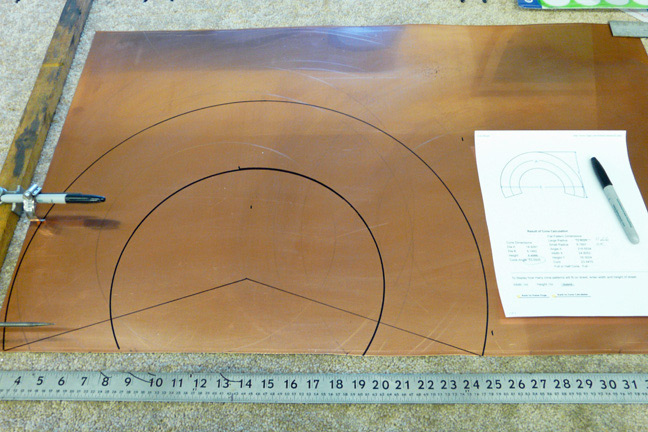
The top of the finial was a cone, so I had to lay out the math using the drawings as a guide for the dimensions. |
 |
|
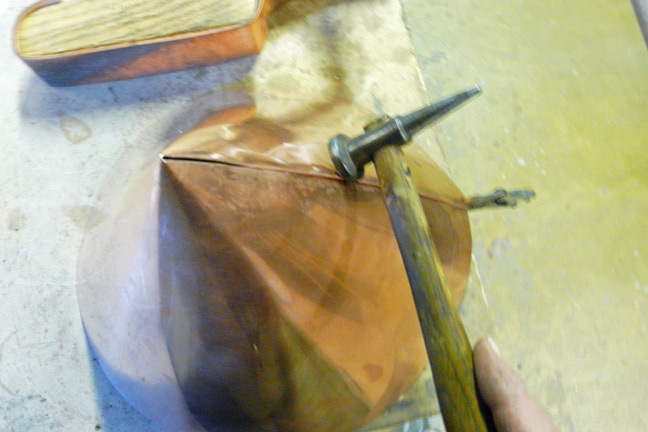
The copper was cut to size and then rolled into a cone, using a long tapered “candlestick” bench stake |

 |
|
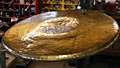
The next element was the bowl shape in the center of the finial. (Reminded me of Humpty Dumpty’s profile.) This also was a conic shape so I laid it out that way. |
 |
|
I rolled up the blank and hammered it on the Angle Post Air Hammer, Model 2500 |
 |
|
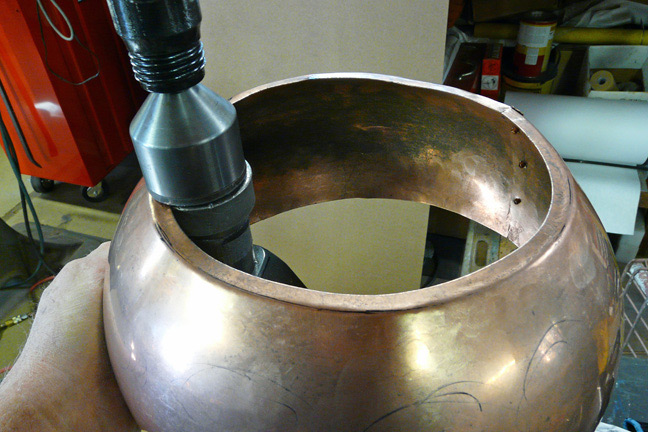
I checked the contour regularly with one of the Profile Gages, until the bowl had both the contour and the circular diameter. |
 |
|
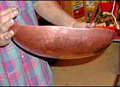
Then I use the Air Power Hammer to turn in the edge of the bowl, a “Flanger Die” operation that also shrunk the edge of the copper just enough so that the finished circle matched a steel template that I had cut just for the job! |
 |
|
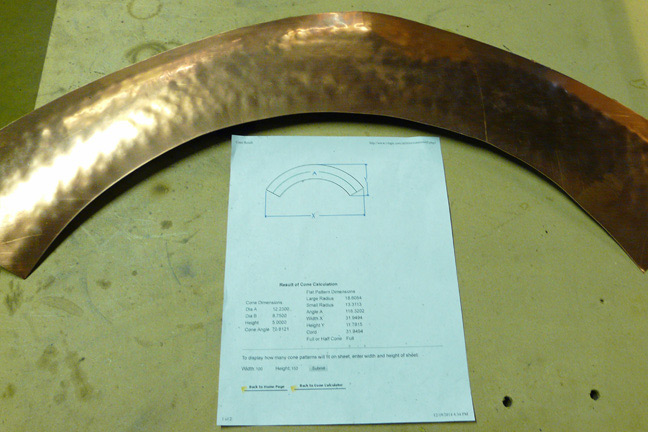
The third element needed laying out because it was also a conic shape. |
 |
|
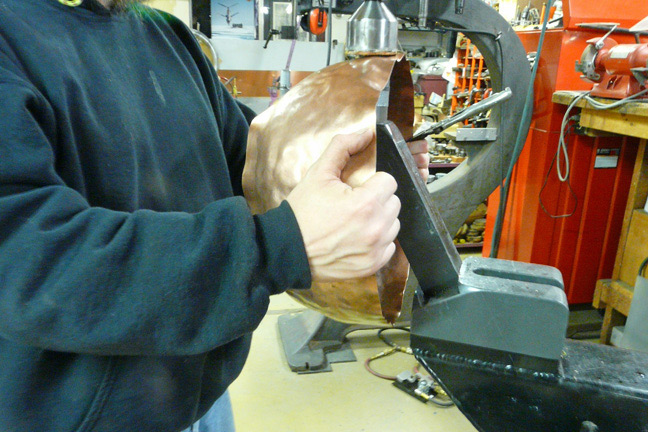
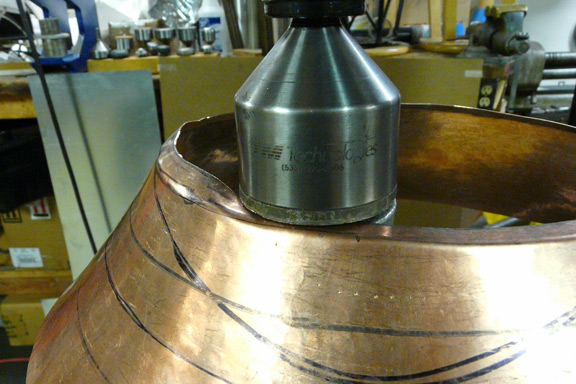
I used the Reverse Dies to flare the conic after I rolled it up. |
 |
|
This made a nice reverse shape, that I could flange the edges on, one in and one out. |
 |
|
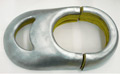
Steel patterns check my geometry. |
 |
|
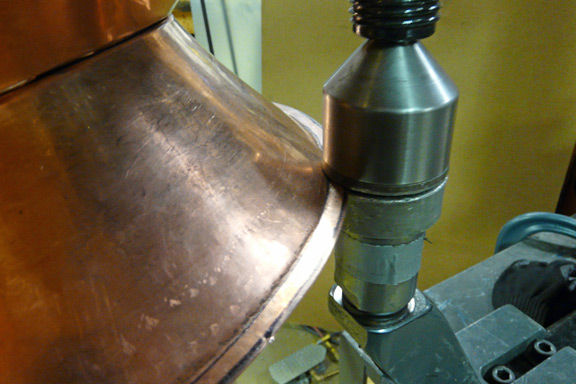
The Air Hammer easily flanges out the foot of the base conic. |
 |
|
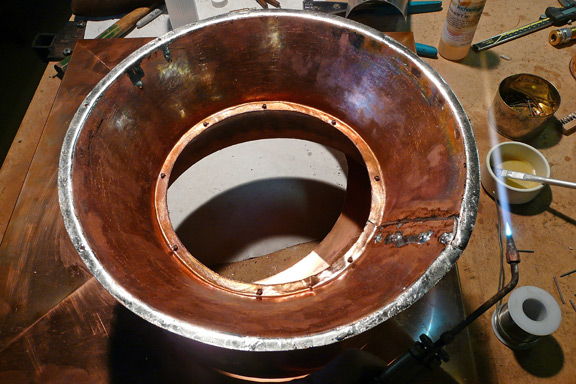
When fits are good and trimming is complete, then I tin the mating surfaces for soldering. |
 |
|
Clecos hold the parts temporarily, while I rivet and then solder all of the seams. |
 |
|
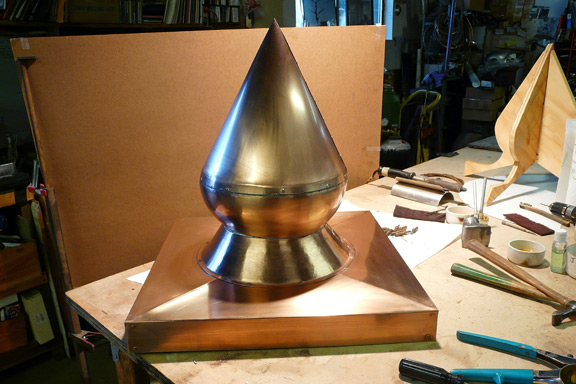
Final view of finished finial. This is a “vaastu” element of harmonious construction, similar to Feng Shui; so shape, size, and location are vitally important. |
 |